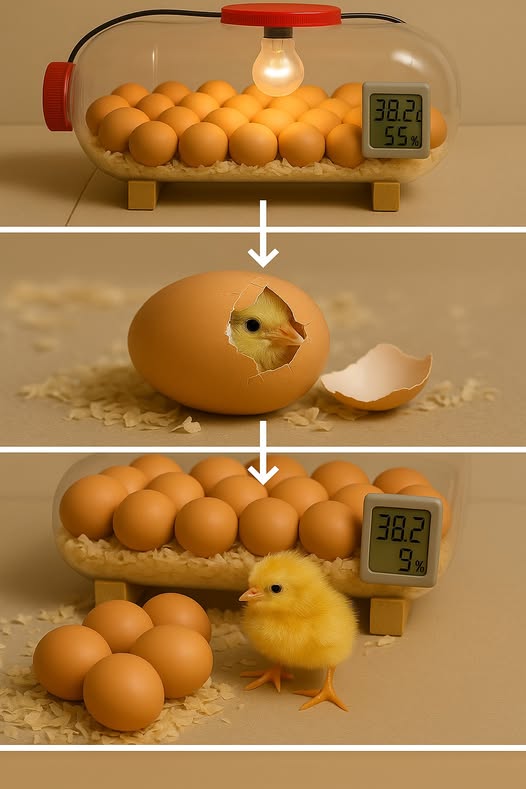
Hatching eggs at home is a rewarding experience, whether you’re raising chickens, ducks, or other poultry. While commercial incubators can be expensive, building your own from a recycled water bottle is a budget-friendly, eco-conscious solution that works surprisingly well. This step-by-step guide will walk you through everything you need — from building the incubator to caring for the eggs until they hatch.
What You’ll Need
-
1 large, clear plastic water bottle
-
Incandescent light bulb or other safe heat source
-
Aluminum foil or reflective tape
-
Thermometer
-
Marker
-
Utility knife or scissors
-
Tape or glue
-
Small dish or container for water
How to Build the DIY Water Bottle Incubator
1. Prepare the Bottle
Clean and dry the plastic bottle thoroughly. Remove all labels. Using a marker, draw a line halfway up the bottle to divide it into top and bottom sections.
2. Cut the Bottle
Carefully cut along the marked line. The bottom half will serve as the incubator base, and the top half will act as the lid.
3. Add Ventilation Holes
Use a utility knife or nail to poke several small holes around the top edge of the bottom half to allow airflow.
4. Install the Heat Source
Place a small incandescent bulb or other gentle heat source on one side of the bottom half. Secure it with glue or tape. This creates a warm zone for the eggs.
5. Add Reflective Insulation
Line the inside of the bottom half with aluminum foil or reflective tape to retain and distribute heat evenly.
6. Insert a Thermometer
Place a thermometer inside, away from direct contact with the bulb, for accurate temperature monitoring.
7. Assemble the Incubator
Put the top half of the bottle back on. Use tape or glue to seal any gaps if necessary.
8. Add a Humidity Source
Place a small open container of water inside the incubator to maintain adequate humidity levels.
9. Test the System
Before placing eggs, test and monitor temperature (around 37.5°C or 99.5°F) and humidity for at least 24 hours.
