Your Simple Step-by-Step Guide to Beautiful Blooms
If you’ve ever dreamed of filling your garden with more roses—without spending a fortune—this easy method is for you. Growing roses from cuttings is not only simple, it’s also a satisfying way to multiply your favorite blooms. Follow these steps and watch your garden come to life!
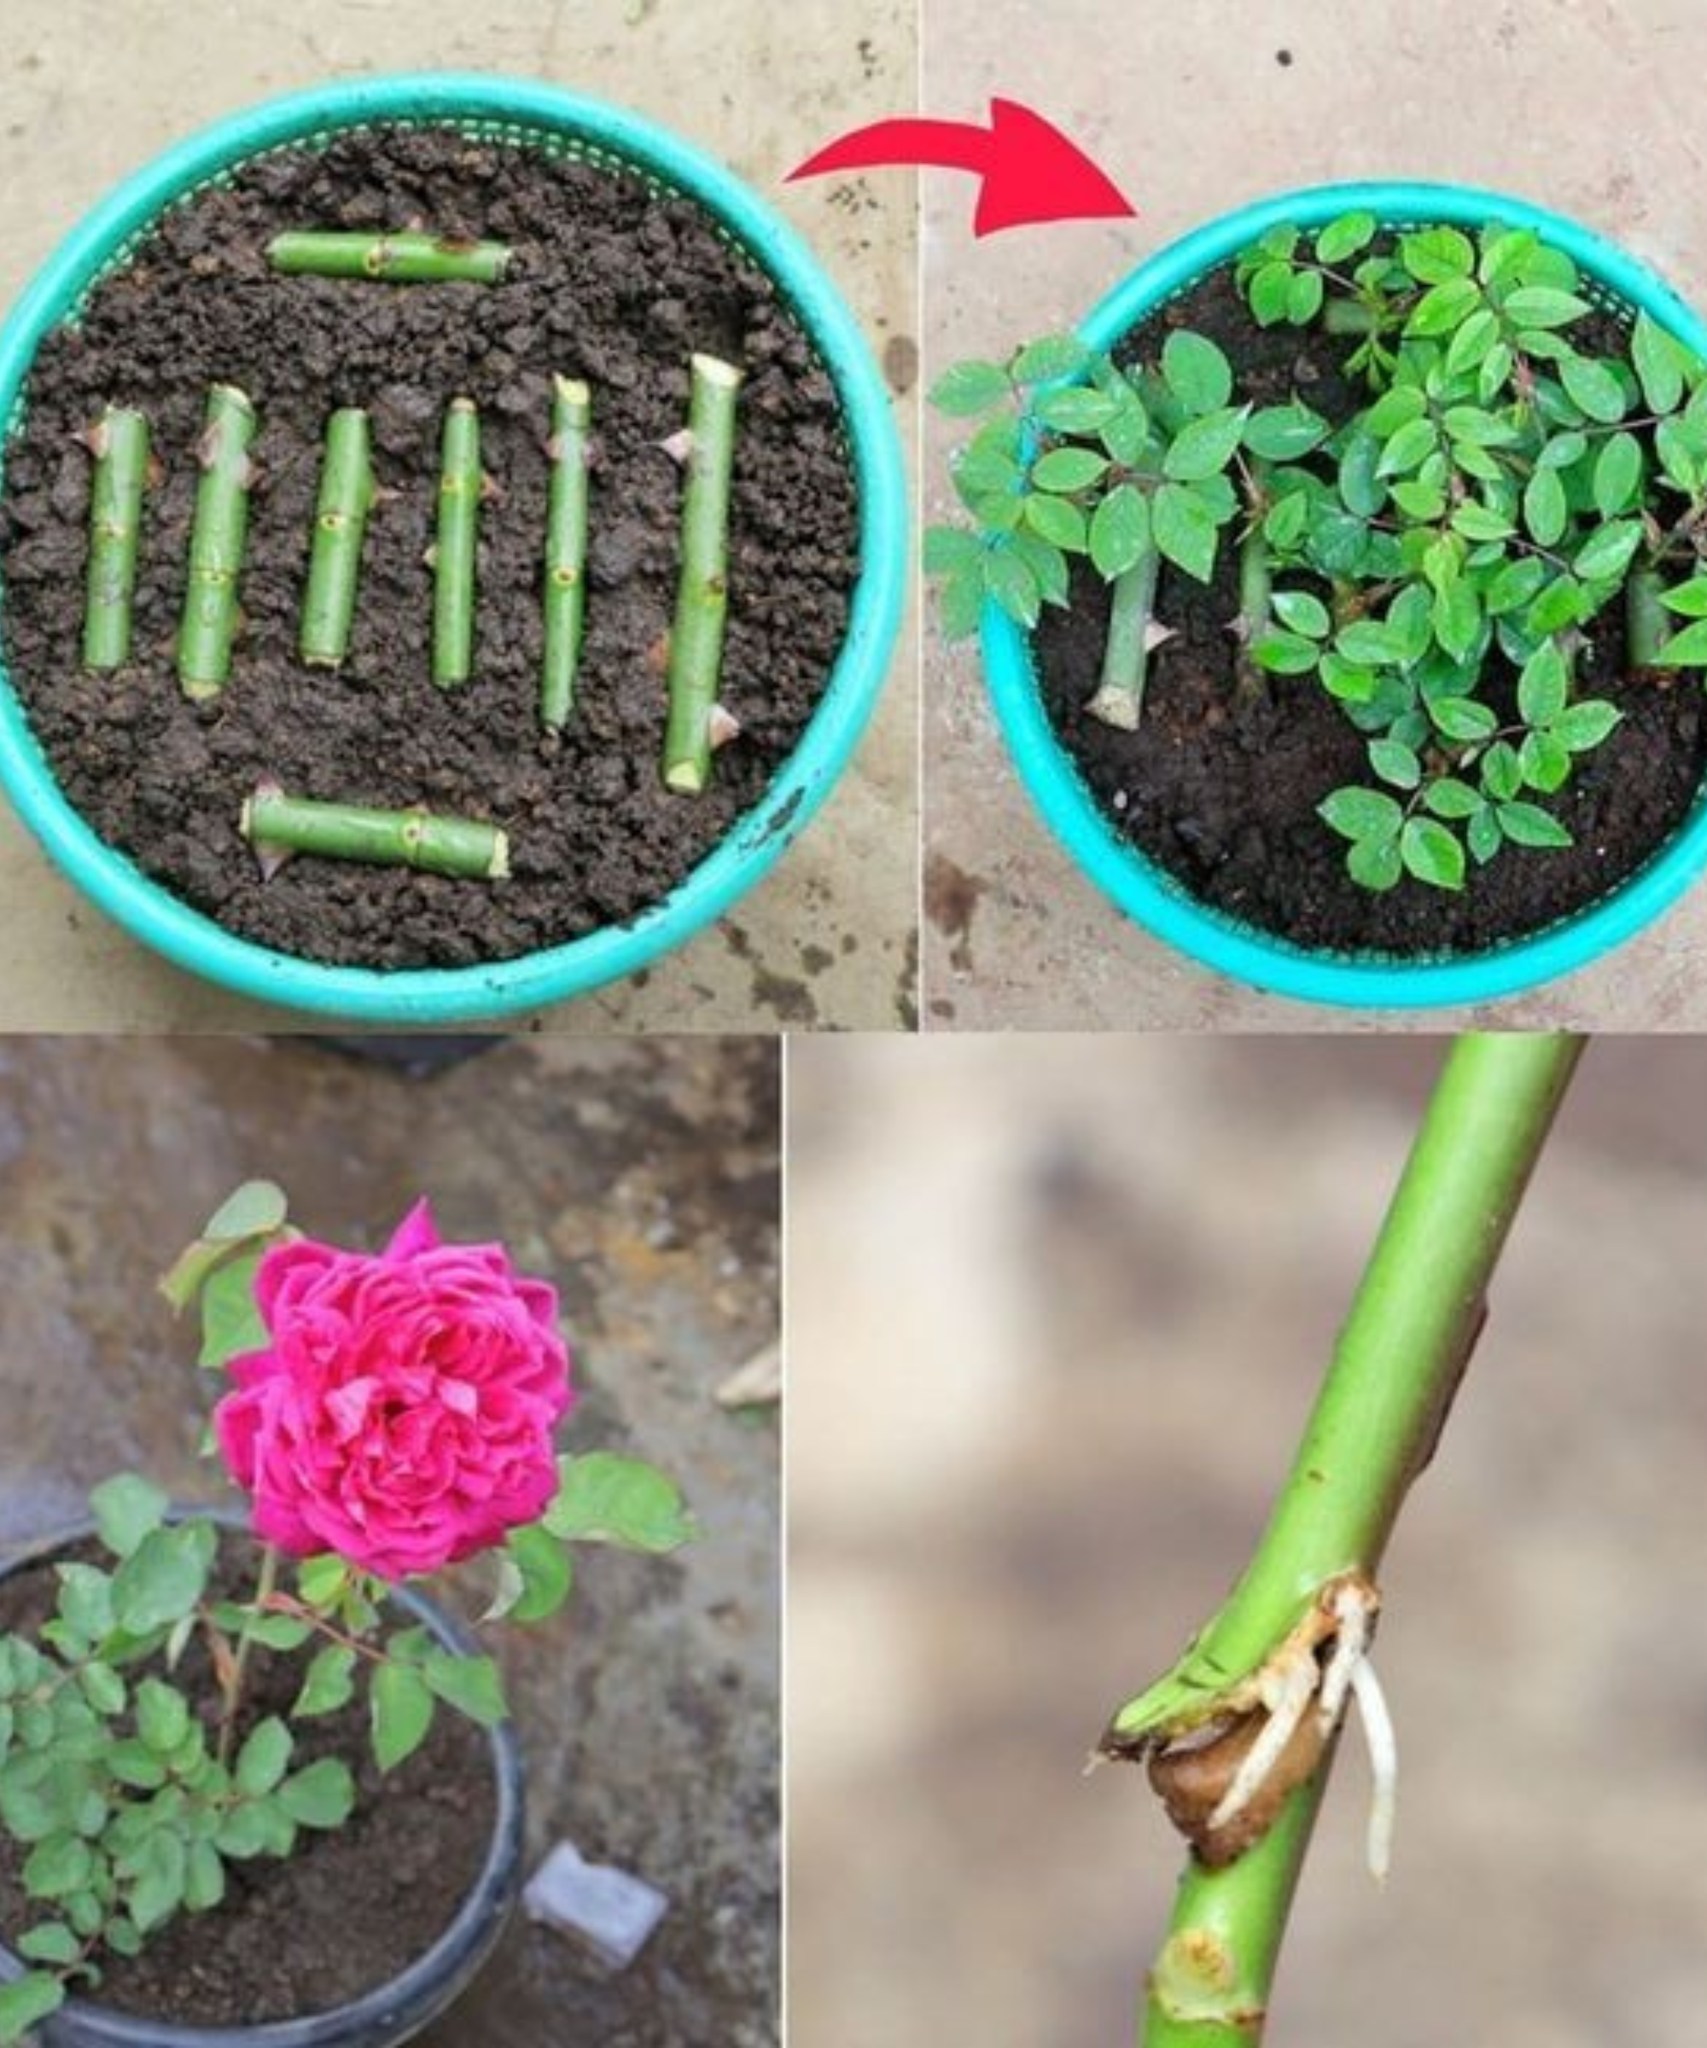
✂️ Step 1: Select Healthy Stems
Start by choosing strong, green, and disease-free stems from an existing rose bush. Look for stems about 6 to 8 inches long with at least 2 or 3 leaf nodes (those little bumps where leaves grow). These nodes are where roots will develop.
🌿 Step 2: Prepare Your Cuttings
Gently remove all the leaves from the bottom of the cutting, keeping only a few at the top. This helps the plant focus on root growth. Make a clean cut just below a node, angled at 45° to increase the surface area for rooting.
🌱 Step 3: Plant in Moist, Well-Draining Soil
Fill a pot with rich, well-draining soil—something light and airy is best. Stick the cutting vertically into the soil, deep enough so that at least one node is below and one is just above the surface. Press the soil gently around the stem.
💧 Step 4: Water & Cover
Water the cutting lightly but thoroughly. Place the pot in a bright spot with indirect sunlight. To speed up rooting, cover the cutting with a clear plastic bottle (with the bottom cut off) to trap humidity. This mini greenhouse effect encourages root growth faster.
⏳ Step 5: Wait for Rooting
Be patient—good things take time! In about 3 to 6 weeks, you’ll start to see new leaves and roots forming. This is your sign that the cutting has taken and is ready for the next step.
