✅ Fertile Eggs
-
Only use fertile eggs — ones laid by hens that have been mated with a rooster.
-
Obtain from a reliable farm or breeder for the best chances of success.
✅ Freshness Matters
-
Use eggs that are no older than 7–10 days.
-
Keep them at room temperature before incubation.
✅ Shell Condition
-
Eggs should be clean but not washed, as washing removes the natural protective coating.
-
Avoid eggs that are cracked, deformed, or too dirty.
✅ Uniformity
-
Select similarly sized eggs — not too large or small — for even incubation.
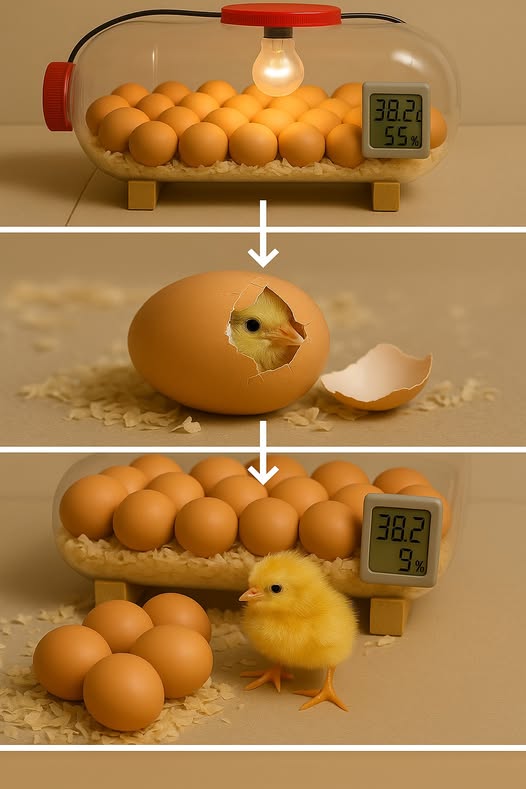
Ideal Incubation Conditions
| Factor | Ideal Range |
|---|---|
| Temperature | 37.5°C to 38°C (99.5°F to 100.4°F) |
| Humidity (Days 1–18) | 50–55% |
| Humidity (Days 19–21) | 65–70% |
| Egg Turning | 3–5 times/day until Day 18 |
| Ventilation | Constant fresh airflow |
Monitoring & Candling
-
Use a candle light or flashlight to check egg development around Day 7 and Day 14.
-
Remove any eggs that show no signs of development.
🐣 The Hatching Stage
Days 19–21 are critical:
-
Stop turning the eggs on Day 18.
-
Increase humidity to 65–70%.
-
Avoid opening the incubator during hatching to keep conditions stable.
-
Be patient — chicks can take 12–24 hours to fully emerge.
Final Tips for Success
-
Monitor temperature and humidity daily.
-
Avoid direct heat on eggs — always test placement first.
-
Keep the incubator in a stable, draft-free location.
-
Only open the lid when absolutely necessary.
-
After hatching, allow chicks to dry fully inside the incubator before moving them.
Conclusion
Crafting a homemade incubator from a recycled water bottle is not only economical but also a fun and educational DIY project for all ages. With careful attention to detail and patience, you can successfully hatch your own chicks at home — no fancy equipment required.
Whether you’re a curious beginner or a homesteading enthusiast, this sustainable incubator offers a great way to start your poultry-raising journey.
Happy Hatching! 🐥
